Deck Truss Bridge - February '04
Installing the second truss
I pre-cut all the pieces and pre-assembled the stringers in the basement, just as I did with the first truss.
The second time was easier and went much faster, but it was also kinda boring... I'm ready to put it all together!
I had brought the stringers out a few days earlier.
After setting them in place I wrapped them in plastic to keep them dry in case it snowed (and it did!) before I could get to the final assembly.

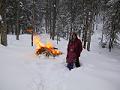
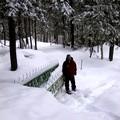
With snow on the ground, I couldn't bring the supplies out in a wheelbarrow, so I used a sled.
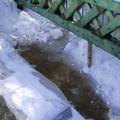
The stream is now filled with about a foot of ice.
Apparently the underground water continues to seep, even in sub-zero winter.
(The bridge is "upstream", behind the camera)
The ice under the bridge is very slick, so I sanded it.
The frozen stream makes it easier to work on the bridge because it gives me a hard, flat surface to stand on (just as it was done in the old days!).
In warmer months the streambed is a wet, muddy mess that is difficult to work around.
The plastic-wrapped stringers are at bottom-left.
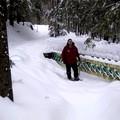
Here's the fully assembled 2nd stringer, looking West (in fresh snow)
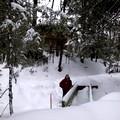
Both stringers with me standing in the frozen and snow-covered streambed.
Looking East, with our house in the background.
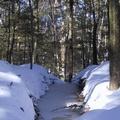
The big cut makes for some good snowshoeing!

As you might imagine, all this bridgebuilding generates a good amount of scrap wood.
What to do with the scrap? Burn it!