The stretch between the Deck Truss and the Big Cut is slightly low. Click here to view this location highlighted on the trackplan
I had originally planned to make a small fill here, but the thought of moving all that dirt was discouraging. So I opted to cross it on a small (1-2 foot tall) trestle.
Check out my Trestle Design page for an explanation of a trestle's parts & details.
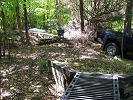
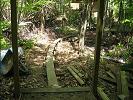
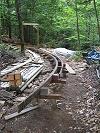
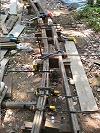
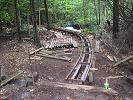
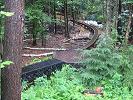
Here's the trestle in progress. It runs from the Deck Truss (bottom of pic) to the Bug Cut (the telltale is barely visible at the top-left).
I have most of the bents installed; I left the last few out for an "excavator crossing"... this is the only spot where I can get an excavator thru to the inside of the Big Cut.
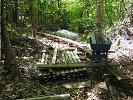
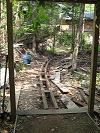
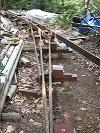
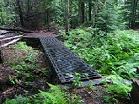
I've temporarily laid 2x10s on the bents as a runway for the wheelbarrow:
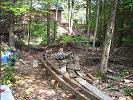
Another view of the same location:
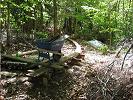
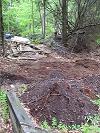
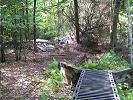
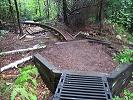
The dirt in the area between the last bent and the Truss Bridge is too high (I piled it there a few years back), so I marked everything for removal:
Same location after removing the excess dirt:
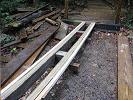
Here's the trestle looking the other direction: Stringers (July 2008)
"Stringers" are the parts that span the 4 feet between the bents. They must be strong enough to support the train yet simple to build.
I've been pondering on how to make the stringers for a while now. I had considered using 4 foot pieces of 2x6s, but the joints atop the 4" wide bents would be tricky to build, not very strong, and pretty expensive.
Then I was reading about spline roadbed for an HO train layout when it hit me - I could use spline roadbed here! (Aside: I built a modular layout with spline in the '70s; I soaked the 1/4" x 3/4" pine strips in our swimming pool to prevent splitting during glue-up!)
A spline is a mathematical method for connecting several points with a smooth curve. In model railroading, spline roadbed is a technique for creating smoothly curving track by gluing together several thin strips of wood.
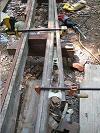
I'll built two stringers - one under each rail - using 1x6's for my "thin" strips of wood. I'll use three "strips" per stringer for 4.5" of solid wood per side. I'll use construction adhesive for glue plus screws and bolts to hold the thing together.
The view from the end of the Cut (thru the telltale; the Deck Truss Bridge is out of frame on the right):
Similar view:
Looking back.
Note the rope on the splines at lower left; until I add more bents I need to hold back the 1x6's so the bent doesn't receive all their lateral force:
The view from the Deck Truss Bridge; I still have about 20 feet to go: Building a stringer
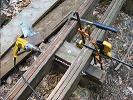
The first step is to apply glue to two splines:
The 3 splines are then bound together into a single beam by incrementally tightening several clamps along their length (slideshow):
Closeup of glue between spline boards:
The final step of binding uses every clamp I own:
I then drill thru both stringers and fasten them with a 3/8" threaded rod.
Note that the stringers aren't actually attached to the bent - the idea is to hold them vertically in place using friction (the threaded rod) but to be easily adjustable should I need to re-level the track.
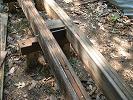
And finally, a completed bent: Completing the trestle (August 2008)
I had been leaving one end of the trestle unfinished because it crossed the path I'm using to get excavators up to the Big Cut.
This was bothering me, though, because I want to lay track all the way to the current end of the cut in order to use a railcar to move materials.
It was a Catch-22: I need to finish the trestle to finish the cut, but I also need to not finish the trestle in order to finish the cut.
My wife had an idea: Why not finish the trestle and find another path for the excavator? Eureka!
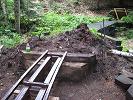
I built the abutment:
I created the Guard Timbers as a single continuous piece, also with spline, by gluing three 1/2" thick strips.
I used the stringers as a form, then once the glue dried I mounted them on the ties and painted them:
After completing the bents, stringers, and guard timbers, I painted the entire thing.
I used a dark brown, but in the end I prefer the black that I used on the Deck Truss. I won't repaint the trestle, but I'll only use black from now on.
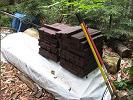
My prepainted ties await installation:
I added the ties and fastened each one at both ends to the guard timbers with fender washers and 3-1/2" screws:
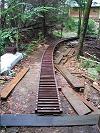
The completed trestle leading out of the Big Cut:
The fill between the two bridges' abutments creates a raised island:
The completed trestle from above:
Click on the image below to view a movie of me walking the completed trestle (3.0MB WMV)