Tunnel
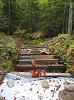
At the high end of the RR, my grading activities have created a trench in which I'll build a tunnel.
Click here to view this location highlighted on the trackplan
The ends of the cut will be open-top cuts with retaining walls, but once the cut gets over 5 feet deep I'll put a roof on it, cover it with dirt, and call it a tunnel.
(See the Construction Progress page for info about building the cut)
I've designed the tunnel as a superstructure outside the cut's retaining walls. I place vertical 6x8's outside the retaining wall posts, then interconnect them with horizontal 6x8s. All 6x8s are held together by rebar "pins".
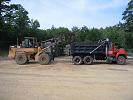
Keeping with my tradition of scrounging stuff for minimal cost, I've found a place nearby that sells used 6"x8"x6' creosoted and pressure-treated timbers ties for cheap - $50 for as many as you can take away. The timbers aren't actual RR ties - these are posts from highway guardrails - but they smell like a railroad!
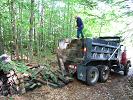
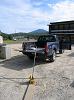
I hired a friend and his dumptruck to bring home 150 timbers. Riding in a big dumptruck was a lot of fun :)
Loading the truck with one of the two-ton bundles of timbers:
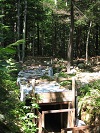
Back home, he dumped the timbers in the woods near my RR:
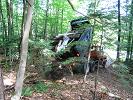
While dumping, the timbers got cockeyed and jammed in the truck bed:
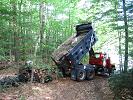
So he had to dump a bunch of timbers by hand using an iron bar:
On to building the thing...
The pile of timbers is about 100 yards from the workface, so I prepare (cut & drill) the timbers at the pile then wheelbarrow them to their final location. I'm really looking forward to having track all the way to the workface - carrying and wheelbarrowing stuff thru the cut is getting old.
I'm using a chainsaw to cut the timbers and have fouind that all the dirt & sand stuck in the creosote wears the chains out very quickly. I have 4 chains and need to have them all resharpened very frequently.
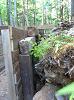
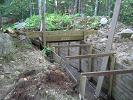
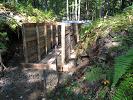
A tunnel support wall:
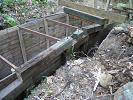
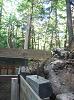
Same location from the other end:
Same location from outside the retaining wall:
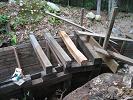
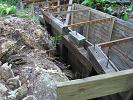
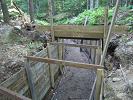
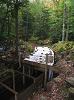
Here are the tops of a wall awaiting roof timbers:
The other (outside) wall:

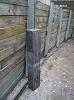
A wall support post, with rebar pin, ready to be moved to the outside of the wall:
All these pinned walls require many 24" pieces of rebar. I used the lumberyard's rebar cutter in their yard. This thing is very heavy and I was pretty worn out after 30 minutes of cutting steel in the hot sun:
(Nice view ot Mt Kearsarge in the background!)
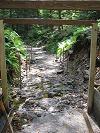
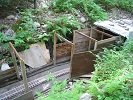
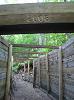
After the walls were done, I created the portal:
Same location from the above of the cut:
Tunnel portal (with no tunnel!) from below:
I used a router to carve the year-of-construction in the portal, just like real RR's do.
After the supporting walls and portal are in place, building the roof is pretty straightforward:
1) install cross-timbers.
2) Add 2x10 roof planks.
3) cover with a plastic sheet (a water and dust barrier).
Here's a slideshow of the evolution:
As with most of this project, the plastic sheet is scrounged; it's the shipping wrappers from bundles of lumber. My local lumber store gives them away for free!
The tunnel's roof is supported by the same 6x8 timbers that I used for the walls.
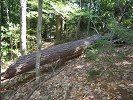
Just for fun, I thought I'd try to create a 6x8 from a fallen tree (using a chainsaw). It turns out to be a LOT of work, and I'm not very good at making straight cuts.
Nevertheless, I did create and use one timber:
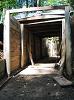
Here's the first 12 feet of completed tunnel (September, 2008):
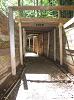
Notice that I painted the year-of-construction black.
Same location from the other end. Eventually the tunnel will extend to and behind the camera:
Extended the tunnel another 16 feet:
Here's a slideshow of building the extension:
Slideshow of building the extension's roof:
Random pic: tunnel walls from the outside, before adding tunnel walls & roof:
Here's how the uphill end of the tunnel now looks:

28 feet of tunnel, with more to come:
August, 2010: Finished the tunnel! Here's a slideshow:
Overview of the entire tunnel: